The Ultimate Guide to Homemade Cereal Bars: Easy, Healthy, and Delicious
Cereal bars are an incredible snack choice for anyone who craves convenience without sacrificing health. Whether you’re hustling through busy mornings or need a wholesome afternoon pick-me-up, these bars are your go-to option. In this guide, we’ll cover everything about making delicious cereal bars at home, from choosing healthy ingredients to simple recipes, allergy-friendly options, and storage tips to keep them fresh.
Discover great ideas like Blueberry French Toast Casserole to fuel your day with more ideas that are just as quick and satisfying.
Introduction to Cereal Bars
Why Cereal Bars Are the Perfect Quick Snack
Cereal bars hit the sweet spot between convenience and nutrition. You don’t need to spend hours in the kitchen or rely on processed store-bought versions. With minimal ingredients and no complicated equipment, cereal bars can be ready in minutes, making them ideal for busy parents, athletes, and anyone needing a quick snack on the go. Plus, they’re endlessly customizable, so you can tweak them based on your preferences or dietary goals.
Cereal bars are also great for portion control. Instead of reaching for unhealthy snacks, a homemade cereal bar satisfies hunger while offering energy from whole grains, proteins, and healthy fats. With these bars in your fridge, you’ll always have a wholesome snack on hand.
Growing Popularity of Homemade Cereal Bars
Homemade cereal bars have exploded in popularity, and for good reason. Health-conscious eaters want control over what goes into their food. When you make your own bars, you avoid excess sugar, artificial additives, and unhealthy fats commonly found in commercial brands.
Thanks to their versatility, cereal bars can be adapted for gluten-free, vegan, high-protein, or low-sugar diets. Plus, the cost savings are significant—homemade bars are budget-friendly, especially when made in bulk. With just a few simple pantry staples, you can whip up delicious bars perfect for lunchboxes, work breaks, or pre/post-workout fuel.
Choosing the Best Ingredients for Healthy Cereal Bars
What Type of Cereal is Best for Cereal Bars?
When it comes to cereal bars, not all cereals are created equal. To make your bars both tasty and nutritious, always start with whole grain cereals. Whole grain options like Cheerios, bran flakes, or puffed brown rice offer a balance of complex carbohydrates and fiber. This combination keeps you feeling full longer and helps maintain steady energy levels.
For those aiming for healthier options, choose cereals that have less than 6 grams of sugar per serving and at least 3 grams of fiber. Avoid highly processed cereals with artificial flavors and colors—they add empty calories and spike blood sugar.
If you want extra crunch, granola-based cereals work well. For a softer texture, stick with puffed grains or lightly toasted oats. The cereal you choose forms the foundation of your bar, so make it count!
Healthier Sweetener Options: Honey vs Brown Rice Syrup
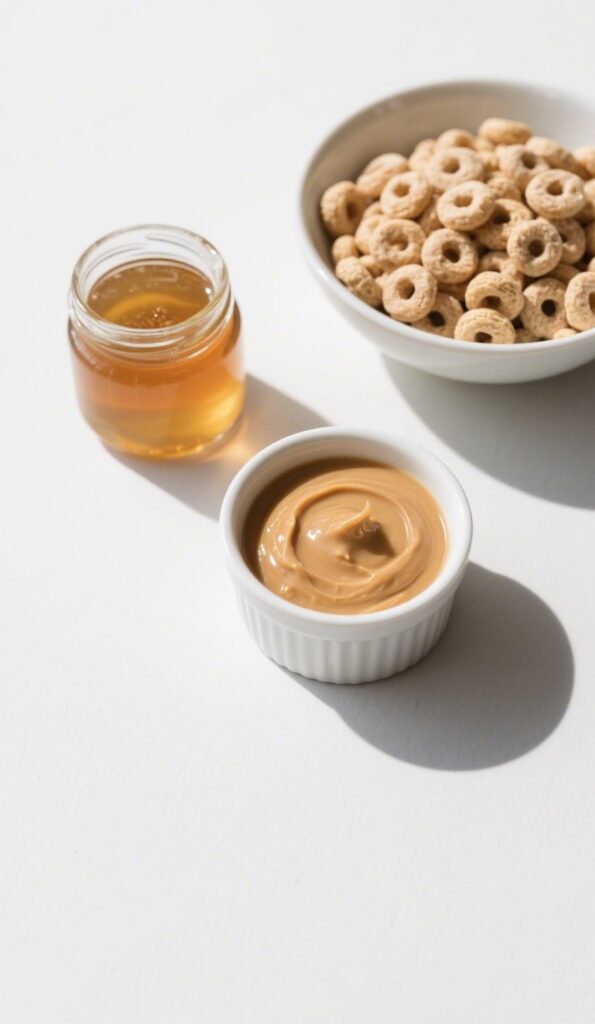
One of the secrets to the perfect cereal bar is the sweetener—it binds everything together while adding natural flavor. Honey is the go-to option because it offers antioxidants, vitamins, and a pleasant natural sweetness. It blends easily with peanut butter and enhances the overall taste without needing refined sugar.
If you follow a vegan lifestyle, brown rice syrup is an excellent alternative. It provides similar binding power with a neutral taste. Though less sweet than honey, it allows other flavors, like vanilla or nut butter, to shine through. Another option includes maple syrup, though it may make bars slightly softer.
Always avoid high fructose corn syrup and artificial sweeteners; they may affect taste and health. Natural options keep your cereal bars wholesome while delivering the necessary stickiness.
Importance of Nut Butters: Peanut Butter and Alternatives
Nut butter brings everything together, providing creaminess, richness, and a boost of protein. Smooth natural peanut butter, especially without added sugars or oils, is a classic choice. It pairs beautifully with honey and whole grain cereals, offering a comforting, familiar flavor.
If peanut allergies are a concern, swap with almond butter, cashew butter, or sunflower seed butter. Each variety brings its own unique taste and nutritional benefits. Sunflower seed butter is an ideal school-safe alternative for nut-free environments.
Additionally, nut butters contribute healthy fats, essential for staying satisfied and energized between meals. When combined with whole grains and natural sweeteners, nut butters create a perfect balance of macronutrients in your cereal bars.
Don’t miss our Maple Tahini Latte !
Simple and Quick Homemade Cereal Bars Recipe
Ingredients Breakdown for Easy Cereal Bars
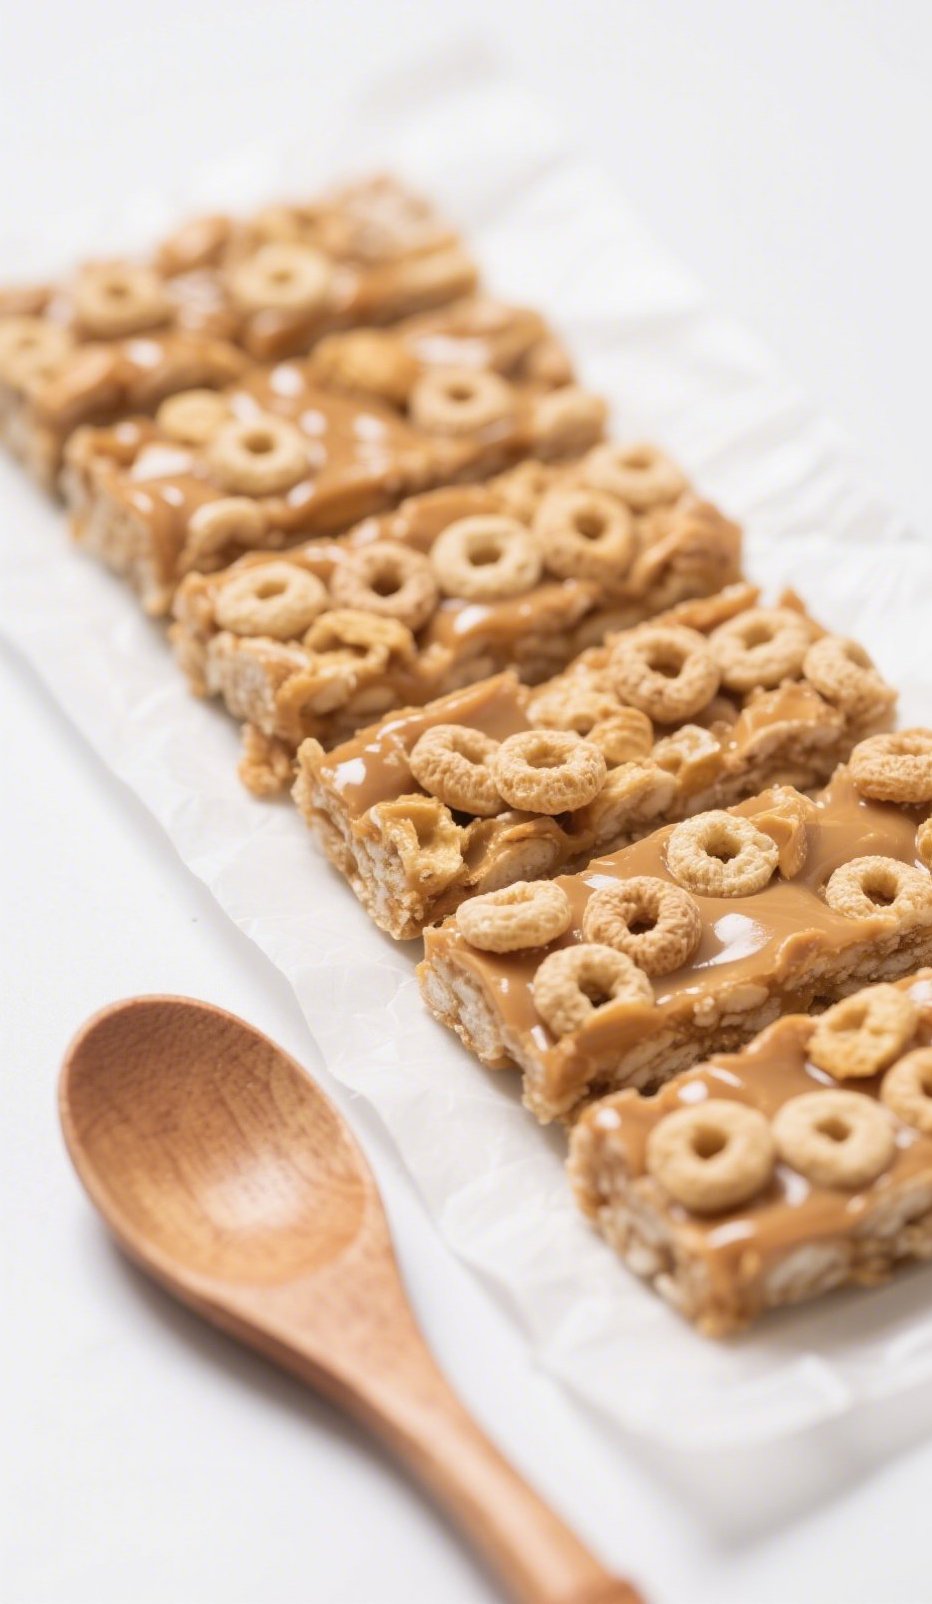
Making cereal bars at home doesn’t require complicated ingredients or fancy equipment. You only need simple pantry staples to whip up a batch of satisfying, nutrient-rich bars. Below is the perfect balance of ingredients for chewy, flavorful no-bake cereal bars:
✔ ½ cup smooth natural peanut butter (Smucker’s Natural or similar works great)
✔ ½ cup honey or brown rice syrup for a vegan-friendly option
✔ 3½ cups O-shaped cereal like Cheerios
✔ ½ teaspoon vanilla extract (optional for a rich, warm flavor)
This ingredient list provides protein, healthy fats, and complex carbohydrates, creating a balanced snack you’ll feel good about eating.
Step-by-Step Instructions to Make Perfect No-Bake Bars
You won’t need an oven for these cereal bars. With just a microwave and a mixing bowl, you’ll have a snack ready in less than 30 minutes!
- Line an 8×8-inch baking pan with parchment paper, leaving a two-inch overhang on both sides to make lifting and slicing easier.
- In a large microwave-safe bowl, add the peanut butter and honey (or brown rice syrup). Microwave for 15-30 seconds until warm and easy to stir.
- Stir the mixture until smooth and well combined.
- Add the cereal and vanilla extract (if using). Stir gently with a wooden spoon until the cereal is evenly coated. Take your time to ensure every piece gets coated without crushing the cereal.
- Transfer the mixture into the prepared baking pan, pressing it down firmly with a spatula or the back of a spoon to create an even layer, reaching into the corners.
- Refrigerate for at least 20 minutes to set.
- Remove from the fridge, lift the slab out using the parchment paper, and slice into 12 equal bars.
Looking for inspiration? Try our Lemon Ricotta Pancakes to pair with your homemade cereal bars!
Nutrition Facts: Are Homemade Bars Better for You?
When compared to store-bought bars, homemade cereal bars offer fewer sugars, no preservatives, and healthier fats. Here’s the nutrition breakdown per bar (based on 12 bars per batch):
| Nutrient | Amount per Bar |
|---|---|
| Calories | 97 kcal |
| Carbohydrates | 14 g |
| Protein | 3 g |
| Fat | 4 g |
| Saturated Fat | 1 g |
| Sugar | 10 g |
| Fiber | 1 g |
| Sodium | 28 mg |
| Potassium | 87 mg |
| Vitamin A | 152 IU |
| Vitamin C | 1 mg |
| Calcium | 23 mg |
| Iron | 2 mg |
Benefits of Making Cereal Bars at Home
Health Benefits of Homemade Cereal Bars
Homemade cereal bars are far healthier than most packaged versions you’ll find in grocery stores. By controlling the ingredients, you can skip artificial preservatives, refined sugars, and unhealthy fats. Instead, your bars are packed with fiber from whole grains, protein from nut butters, and natural sweetness from honey or brown rice syrup.
Eating homemade cereal bars means fewer sugar crashes and more sustained energy throughout the day. They are also free from chemicals or additives often hidden in commercial bars, making them safer, especially for kids.
For even more wholesome options, don’t miss our Almond Butter Chia Pudding to keep you energized naturally.
Cost-Effective Compared to Store-Bought Options
One major advantage of making cereal bars at home is the cost savings. Store-bought bars can cost $1 to $3 per bar, while homemade versions cost just a fraction—especially when you buy ingredients in bulk. Plus, you get more bars per batch and avoid paying for fancy packaging.
This makes homemade cereal bars the perfect budget-friendly snack. With one trip to the grocery store, you can make enough bars to last your family a whole week, saving you both money and time.
Customization Benefits for Your Diet
The best thing about DIY cereal bars? You control every ingredient. Whether you’re following a vegan, gluten-free, high-protein, or low-sugar diet, it’s easy to tweak the recipe to fit your needs.
- Want more protein? Add chia seeds or protein powder.
- Need to reduce sugar? Use unsweetened cereal and lower the honey.
- Following a vegan diet? Choose brown rice syrup instead of honey.
Customization is what makes homemade cereal bars so versatile—they’re suitable for everyone in your household, from kids to athletes.
Tips and Tricks for Perfect Cereal Bars Every Time
How to Prevent Cereal Bars from Falling Apart
One of the most common struggles when making homemade cereal bars is getting them to hold together. The secret? The right balance of sticky binders and proper chilling time. Always use enough honey or brown rice syrup to coat every cereal piece fully. Firmly press the mixture into the pan, ensuring it reaches every corner.
Chilling is essential. Refrigerate the bars for at least 20 minutes before slicing. If you skip chilling or rush the process, your bars may crumble. Want even firmer bars? Freeze them for 10 minutes before cutting.
Ideal Storage Solutions: How Long Can I Store These?
Homemade cereal bars stay fresh for up to 1 week in the fridge when stored in an airtight container. If you want to extend shelf life, wrap each bar individually in plastic wrap and freeze. Frozen bars last up to 2 months and defrost quickly at room temperature.
A great tip is to cut and wrap bars right after chilling. This way, they’re ready to grab-and-go, making mornings and snack times effortless.
Smart Tips for Perfect Texture and Flavor
If you want your cereal bars to taste just right every time, keep these quick tips in mind:
- Use fresh, crisp cereal for the best crunch.
- Lightly toast your cereal for extra flavor depth.
- A splash of vanilla extract or pinch of sea salt can elevate the overall taste.
- Add-ins like mini chocolate chips, chopped nuts, or dried fruits introduce exciting texture and variety.
Experiment with combinations like dark chocolate and almond or cranberry and pecan to keep things interesting. It’s impossible to get bored when you can change flavors any time you like!
Cereal Bars for Every Dietary Need
Can I Adjust Cereal Bars for Food Allergies?
Absolutely, cereal bars are one of the most allergy-friendly snacks you can make at home. Whether you’re avoiding nuts, dairy, or gluten, a few simple swaps can make your bars completely safe and equally delicious.
✔ Nut-free option: Swap peanut butter for sunflower seed butter or pumpkin seed butter.
✔ Dairy-free option: Most cereal bar recipes are naturally dairy-free, but be cautious with chocolate or add-ins.
✔ Gluten-free option: Use certified gluten-free O-shaped cereal or puffed rice to avoid any gluten contamination.
By adjusting the base ingredients, you can enjoy cereal bars that fit your specific needs without sacrificing flavor.
Kid-Friendly and School-Safe Cereal Bar Ideas
Making cereal bars for kids means keeping things simple, fun, and allergy-friendly—especially for school lunches. Schools often have strict “nut-free” policies, so you can easily adapt your recipe:
- Use sunflower seed butter or oat butter.
- Sweeten with honey or brown rice syrup for clean, natural taste.
- Mix in fun extras like mini dairy-free chocolate chips or rainbow sprinkles.
Pre-wrap bars and add them to lunchboxes for a safe, satisfying snack that kids will actually finish.
Don’t miss our guide on fun vegan snacks for more playful, allergen-friendly snack ideas.
Vegan and Gluten-Free Cereal Bar Variations
Need your bars to be both vegan and gluten-free? It’s easier than you think:
- Sweetener: Use brown rice syrup or maple syrup instead of honey.
- Cereal: Choose gluten-free cereals made from oats, puffed quinoa, or millet.
- Binding: Pair with plant-based butters like almond butter or sunflower seed butter.
- Add-ins: Use dried fruits, seeds, and dairy-free dark chocolate for flavor variety.
This combination creates a chewy, delicious snack that fits nearly every dietary preference while delivering balanced nutrition.
Flavor Variations to Never Get Bored
Chocolate Peanut Butter Cereal Bars Recipe
If you love the classic chocolate-peanut butter combo, this variation is for you. Simply melt dark chocolate chips with peanut butter before adding your cereal. The chocolate coats the cereal, creating a rich, indulgent bar that still stays healthy.
Optional additions:
- A pinch of sea salt enhances the flavor.
- A drizzle of melted chocolate on top adds a bakery-style finish.
- Use semi-sweet or dark chocolate chips for less sugar.
This version is a favorite for both kids and adults, offering that dessert-like taste without processed junk.
Fruit and Nut Cereal Bars Recipe
For those who prefer something fruity and crunchy, the fruit and nut cereal bar hits the mark. Add ½ cup of chopped almonds, walnuts, or pecans and ⅓ cup of dried cranberries or raisins to the base recipe.
Flavor boost options:
- A touch of cinnamon or nutmeg for warmth.
- A splash of orange zest for a citrusy punch.
- Mix of seeds (chia, pumpkin, or flax) for added nutrition.
This variation is excellent for afternoon cravings when you need a satisfying chew without reaching for candy.
High-Protein Cereal Bars for Fitness Enthusiasts
Need a post-workout snack? Transform your cereal bars into high-protein energy boosters by adding a scoop of your favorite protein powder (vanilla or unflavored works best). Include crushed peanuts, chia seeds, and a handful of oats for extra bulk and fiber.
How to modify:
- Use slightly more honey or syrup to compensate for the dryness of protein powder.
- Press bars extra firmly to keep them from crumbling.
- Store in the fridge for firmer bars ideal for gym bags.
These high-protein cereal bars make an excellent addition to your fitness nutrition plan—easy to grab and perfectly balanced for muscle recovery.
FAQS:
What Type of Cereal is Best?
The best cereal for homemade cereal bars depends on your goals. For healthier options, always choose whole-grain, low-sugar cereals like plain Cheerios, bran flakes, or puffed rice. These cereals provide fiber and sustained energy without a sugar crash.
If you prefer a crunchy texture, lightly toasted oats or granola-based cereals are excellent choices. Want a softer, chewier bar? Puffed grains like puffed quinoa or millet work perfectly. Always check nutrition labels and avoid cereals with high fructose corn syrup or artificial coloring.
How Long Can I Store These?
Homemade cereal bars are easy to store and keep well. When placed in an airtight container, they last:
Up to 1 week in the refrigerator
Up to 2 months in the freezer
For best results, wrap individual bars in plastic wrap or parchment paper to maintain freshness. This makes them super convenient to grab on busy mornings or pack in lunchboxes.
Tip: Freeze a batch and pull out bars as needed—perfect for weekly meal prep!
Can I Adjust Them for Food Allergies?
Yes, cereal bars are extremely flexible when it comes to allergy-friendly adjustments. Here are a few easy swaps:
Nut-Free: Use sunflower seed butter instead of peanut butter.
Gluten-Free: Opt for certified gluten-free cereals like puffed brown rice or gluten-free oats.
Vegan: Replace honey with brown rice syrup or maple syrup, and skip any dairy-based add-ins.
With these easy modifications, cereal bars can suit nearly any dietary restriction, making them one of the most adaptable snacks you can prepare at home.
Conclusion and Final Thoughts on Homemade Cereal Bars
Why Homemade Cereal Bars Are Worth the Effort
Homemade cereal bars aren’t just a snack—they’re a smart solution to eating healthier, saving money, and enjoying something truly delicious. With full control over the ingredients, you get to skip preservatives, lower your sugar intake, and fuel your body with whole foods.
Plus, the flexibility is unmatched. Whether you want a high-protein snack for the gym, a nut-free treat for school lunches, or a sweet afternoon pick-me-up, cereal bars can be customized in minutes to fit your exact needs.
You’ll love how quick it is to make them, and your family will love how good they taste.
Quick Recap of Essential Tips and Recipes
To sum it up:
✔ Use whole grain, low-sugar cereals for the healthiest base.
✔ Choose natural binders like honey or brown rice syrup for the perfect texture.
✔ Add in seeds, dried fruits, or chocolate to keep flavors fun and exciting.
✔ Adjust for allergies with easy swaps like sunflower seed butter or gluten-free cereals.
✔ Store them in the fridge or freezer for a snack that’s always ready when you are.
Making cereal bars at home is simple, satisfying, and healthier than store-bought options.
Print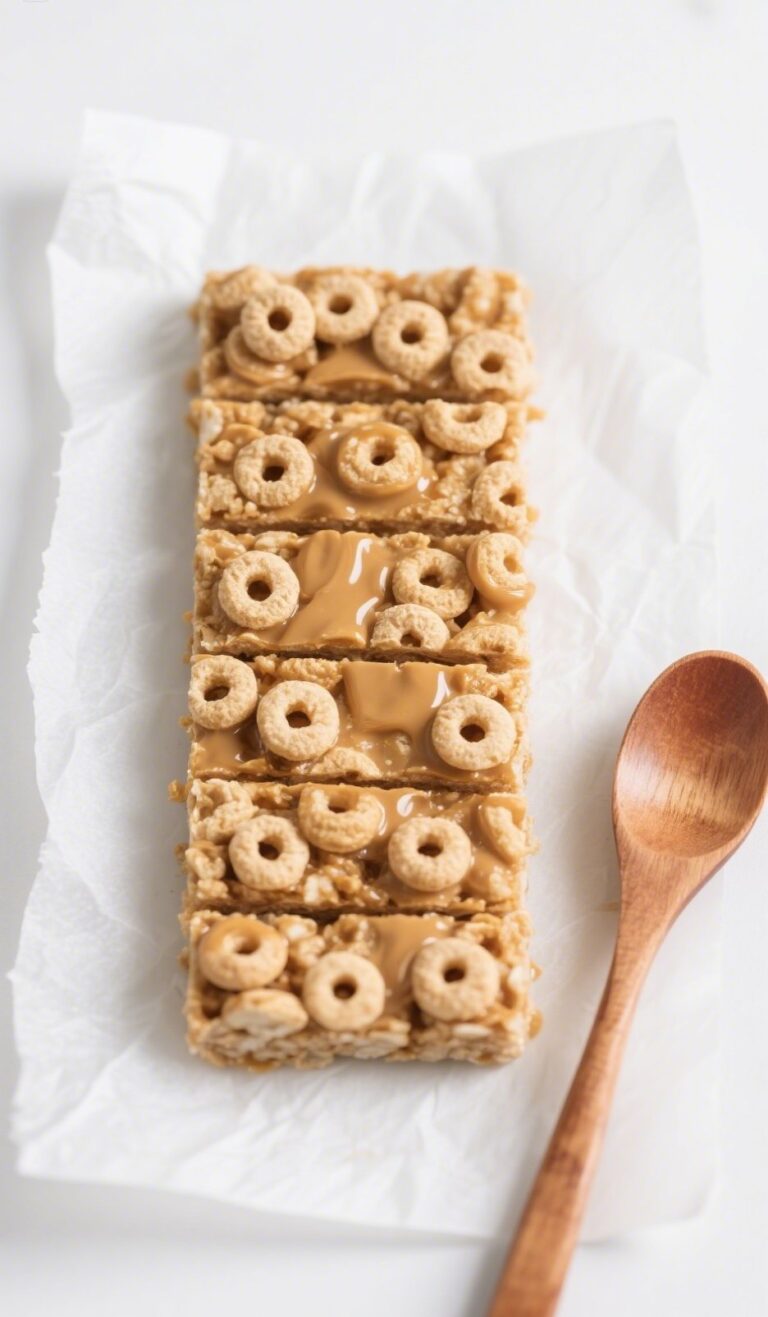
Simple Homemade Cereal Bars
These easy no-bake homemade cereal bars are the perfect healthy snack for busy mornings, school lunches, or post-workout fuel. Made with wholesome ingredients like natural peanut butter, honey, and whole grain O-shaped cereal, these chewy bars are loaded with energy and flavor. They take just 5 minutes to prepare and are completely customizable for any dietary need—including nut-free, gluten-free, and vegan options. With no refined sugars or preservatives, you’ll feel great about every bite. Store them in the fridge or freezer for a quick grab-and-go option anytime. Make a big batch and enjoy delicious, cost-effective, and nutritious cereal bars that are better than store-bought!
- Total Time: 25 minutes
- Yield: 12 bars 1x
Ingredients
- ½ cup smooth natural peanut butter
- ½ cup honey or brown rice syrup
- 3½ cups O-shaped cereal
- ½ teaspoon vanilla extract (optional)
Instructions
- Line an 8×8-inch pan with parchment paper.
- Microwave peanut butter and honey for 15-30 seconds and stir.
- Mix in cereal and vanilla extract.
- Press into pan and chill for 20 minutes.
- Slice into bars and enjoy!
Notes
Store in fridge for 7 days or freezer for 2 months.
- Prep Time: 5 minutes
- Chill Time: 20 minutes
- Category: Breakfast
- Method: No-Bake
- Cuisine: American
Nutrition
- Serving Size: per bar
- Calories: 97 kcal
- Sugar: 10 g
- Sodium: 28 mg
- Fat: 4 g
- Saturated Fat: 1 g
- Carbohydrates: 14 g
- Fiber: 1 g
- Protein: 3 g